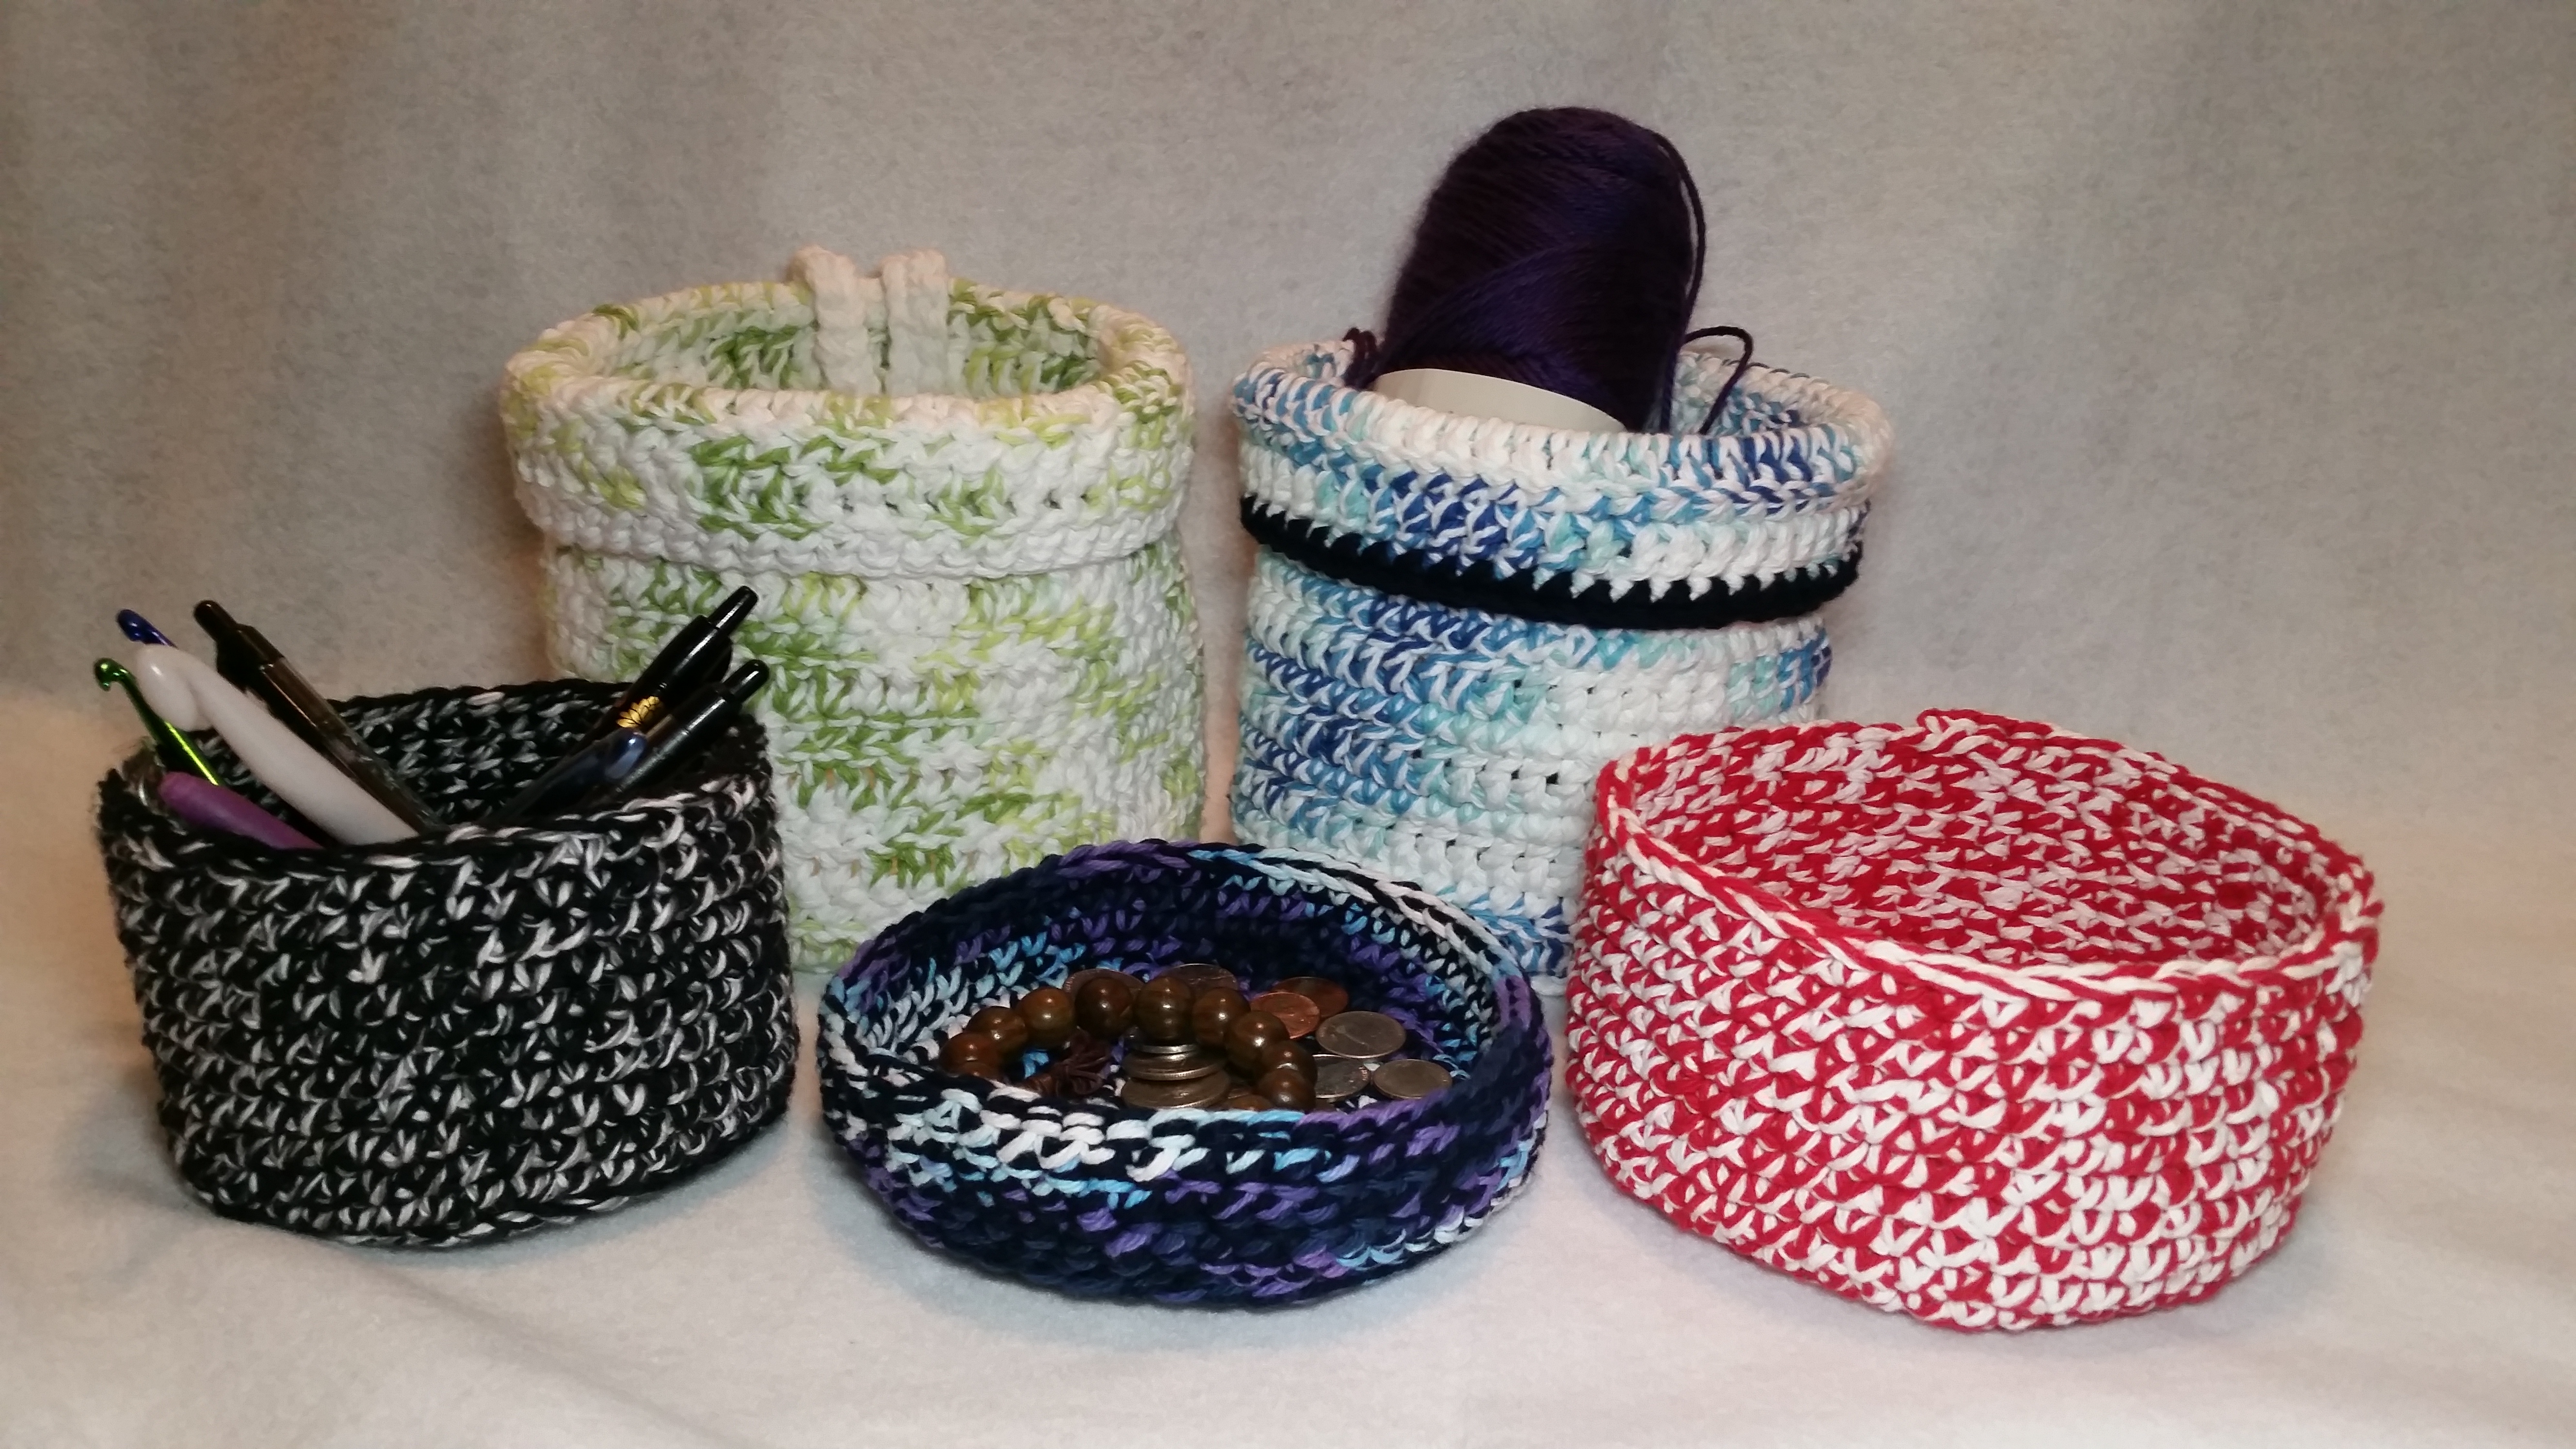
 Baskets are awesome regardless of the size. One of the best crochet gifts or projects is a crochet storage basket. There are hundreds of different ways to do this, so below is my version of the crochet storage basket pattern (and how to modify it to make the versions in the picture you see here!).
The most important things for a basket are:
- Versatility
- Durable- as in, can handle ANYTHING I put it in it
- Looks amazing
- Can be washed easily (let’s face it, stuff happens)
Difficulty: Beginner
Abbreviations:
- ch- chain
- sl st- slip stitch
- sc- single crochet
- dc- double crochet
- st, sts- stitch, stitches
Materials:
- 2 strands of cotton yarn
- Cotton yarn is extremely durable and can handle a lot of weight, so I recommend this for all baskets that hold a lot of items
- If worsted weight yarn or some type of acrylic yarn is used, expect the basket to be extra soft and foldable. If that’s the kind of basket you want, then go for it! Soft baskets are cool too
- Size K (6.5mm) Crochet Hook
- Stitch Markers
The Beginning:
These baskets are worked in the round, check out YouTube for video tutorials if there are questions.
Place a stitch marker in the first stitch of every round, otherwise stitch count may be off.
- Ch 2. 6 sc in second st from hook (do NOT sl st) (6 sts)
- 2 sc in each sc around (12 sts)
- Sc in first st, 2 sc in second st, continue around to stitch marker (18 sts)
- Sc in first 2 sts, 2 sc in third st, continue around to stitch marker (24sts)
- Sc in first 3 sts, 2 sc in fourth st, continue around to stitch marker (30 sts)
- Sc in first 4 sts, 2 sc in fifth st, continue around to stitch marker (36 sts)
- Sc in first 5 sts, 2 sc in sixth st, continue around to stitch marker (42 sts)
- Sc in first 6 sts, 2 sc in seventh st, continue around to stitch marker (48 sts)
- Sc in first 7 sts, 2 sc in eighth st, continue around to stitch marker (54 sts)
The base should measure 6 inches in diameter. Add more or less rows to achieve desired diameter.
The Sides:
All of the sides start the same: Work in the back loops of the base to make a more defined base and side. This will also let the pretty side of your work be on the outside!
Simple Crochet Storage Basket Sides (the ones without the hanging hook and folded over edge)
After the base is completed, work a single crochet into the back loops of each stitch. This will make the pretty/correct side of the work on the outside of the basket. Continue working one single crochet in each stitch around until the desired height (my blue and purple one was 3 rows high, or 1.5″. the red and white one was 7 rows high, or 3″). Once desired height has been reached, slip stitch twice before finishing off. Weave in ends.
I have heard that a good way of finishing baskets is by blocking them, however I have not seen a difference with cotton yarn. Because we are using 2 strands of yarn and the hook size is not too large, the stitches are tight, so I don’t believe it matters either way if you are making the basket according to my design.
Hanging Basket with Edge (also known as the Organization! Now Basket)
The hanging baskets that I made above (the blue and green ones) were a spin-off from a basket made by Moogly (see pattern here). She made an excellent design, but I modified it to have 2 strands of cotton yarn and a 5.5mm crochet hook. I also added an additional row of single and double crochets before making the folded over section so that longer items could get tossed in.
Now you have a few options to get started with organization. Any of the baskets above would also be great as a handmade touch to a gift, or as a way to decorate the office. Have fun getting ready for Spring! (But really, any time of year is great for baskets!) Post pictures on our Facebook or tag us on Twitter. I can’t wait to see your finished product!
Copyright 2015 Unique Yarn Designs. This pattern may not be distributed in any way. Do not copy, and do not email unless it is the actual link. If products are made to sell, please add the link to this pattern in the description so that others may see it and learn from it. Thank you for respecting my work!


Leave a Reply